Convert raster image to vector
There are lots of programs available for converting raster images into vector images: Illustrator in Adobe is one of the best way in converting raster to vector images using the feature presets.
Note: This tutorial uses Adobe Illustrator CS5. Functionality is essentially the same for newer versions of Illustrator, but the screens will look a little different.
The first step to convert raster image to vector is to choose an appropriate image. Large, high contrast images are ideal.
Open the file in Illustrator and choose the Selection tool. Click on the image you want to vectorize and the image’s four sides will turn light blue to let you know that it has been selected.
Next we turn to Live Trace to transform the pixels from your original images into lines and shapes.
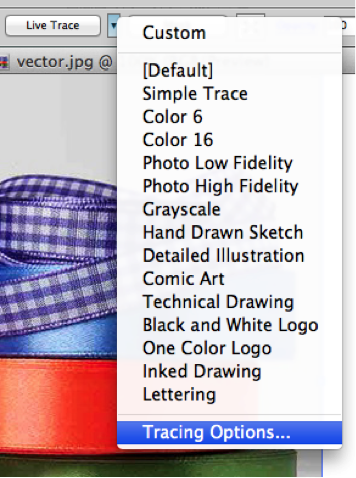
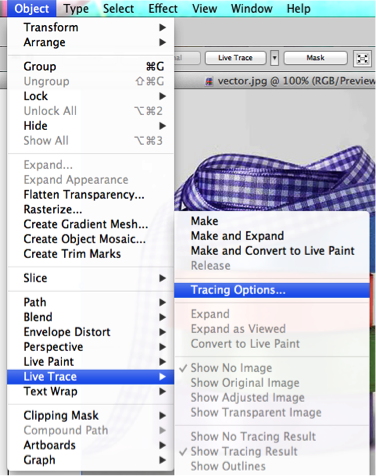
Either choose Tracing Options from the drop-down menu next to Live Trace at the top of the screen or go to Object → Live Trace → Tracing Options.
Turn on Preview to see the changes being made before any effect is applied, and move the Tracing Options box off of the image.
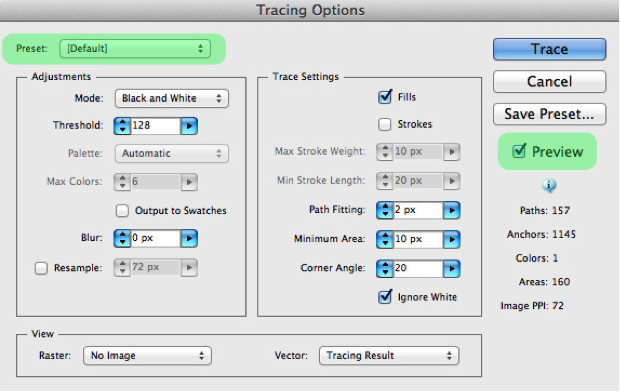
The default setting is black and white, which is great if the final product is, say, a two- or three-color screenprint.
There are many options available in the Presets for you to play around with. You will rarely, if ever, use the Hand Drawn Sketch, Technical Drawing, Inked Drawing, or Lettering presets, but it’s fun to test them all, especially when you’re first getting familiarized with Live Trace.
The Threshold value tells Illustrator where we want to trace our lines and is only available for the black and white mode. A high threshold setting creates a “heavier” image as more gray pixels are represented as black; conversely, a low threshold represents more gray pixels as white and results in a “lighter” image.
All of the presets can be changed to Color, Grayscale, or Black and White by selecting the appropriate Mode. The number of colors can be increased or decreased by adjusting the “Max Colors” setting.
Blur is set to 0 pixels by default, and anything higher will add more Gaussian blur. A lower Minimum Area or higher Path Fitting will sharpen your lines (though too low a Path Fitting results in jagged lines), and a lower Corner Angle will sharpen your corners.
By clicking the Fills checkbox, Live Trace creates closed, filled vector paths, and the end product more closely resembles the original image. When the Strokes checkbox is selected, Live Trace creates stroked, open paths when the original stroke weight is less than or equal to the Max Stroke Weight setting, and so fewer anchor points are left in the final image.
Clicking the “Ignore White” checkbox makes it so that any pure-white spaces inside and surrounding the image aren’t identified as additional shapes. If you want this, Ignore White has to be the last step before you apply the Live Trace settings.
Once you’re happy with the image, click “Trace” on the dialog box and then “Expand” from the top bar.
![]()
Voila! You now have a vector image.